
Reviewed · PHOTOGRAPHY SESSIONS
Tokyo Cyberpunk Street Photo Tour
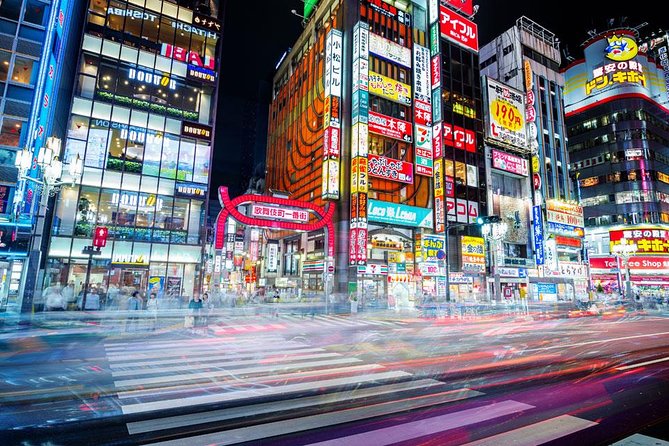
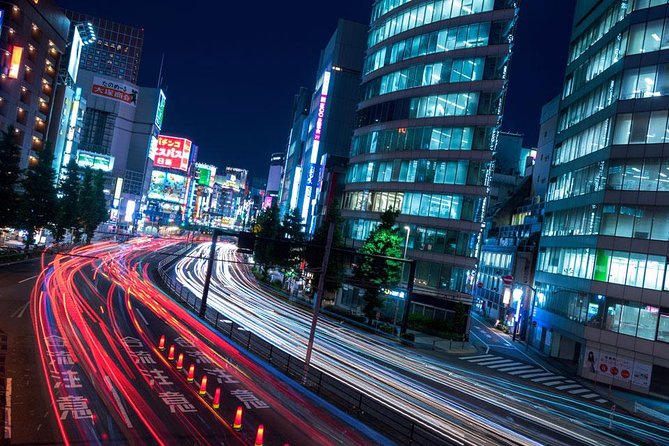
Tokyo looks made for photography after sunset. Neon signs, crowded crossings, narrow lanes, glowing shop fronts, and passing trains give you plenty to frame. This three-hour evening walk takes you from Shinjuku to Shibuya, with a professional photography guide showing you how to handle low light, motion, and crowded streets.
I like two things right away: you can use a smartphone, and the group is capped at four people. Guides such as Charles, Lukasz, Luke, and Stephane have helped people with everything from basic phone controls to Canon and Fuji camera settings. I also like the route itself, especially the contrast between Shinjuku’s tight back streets and Shibuya’s huge crossing.
The main drawback is the pace. You walk through crowded districts and change areas by train, so this suits you best if you can keep up and stay alert. One past participant lost sight of the guide after falling behind, and the large Shinjuku Station meeting area can take time to navigate.
Key points to know before you book
- Shinjuku starts the evening: Begin around Kabukicho and Omoide Yokocho, where signs, alleys, and moving crowds give you varied night scenes.
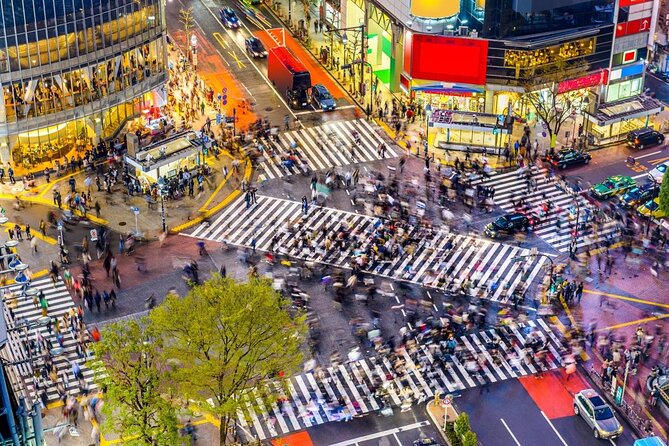
- Shibuya provides the big finish: The tour ends at Shibuya Crossing, a strong place to practice long exposure and crowd photography.
- Phone users are welcome: Guides can explain exposure, contrast, framing, and lock functions on an iPhone or similar phone camera.
- Small groups matter: With no more than four people, the instructor can look at your camera and offer personal corrections.
- Train fare is extra: You travel from Shinjuku to Shibuya by train, and that cost is not included.
- The weather matters: The experience requires good weather, with another date or a full refund offered if poor weather forces cancellation.
What this Tokyo night photography tour is really about
This is not a sightseeing walk with a camera added on. Photography is the main purpose. You will see well-known parts of Tokyo, but the guide’s attention goes toward composition, exposure, shutter speed, long exposure, and finding a clean frame in a crowded place.
That focus is useful because Tokyo at night can overwhelm a new photographer. There are bright signs, dark lanes, headlights, reflective pavement, and people moving in every direction. A guide can help you decide what to include and what to leave out, instead of leaving you to point your camera at the nearest neon sign.
You do not need advanced skills. Beginners can learn how to control basic settings, while more experienced photographers can ask about a particular camera or technique. The strongest part of the experience is the workshop style: the instructor demonstrates a setting or composition, then gives you time to try it yourself.
The group size makes a difference here. The maximum is four people, and some departures may be even smaller. Guides have spent time with people using Canon and Fuji cameras, as well as visitors carrying only an iPhone. That personal help is worth more than a general photography lecture because the advice applies to the equipment in your hand.
Other photo sessions in Tokyo:
- Tokyo Ryogoku Sumo Morning Practice + Photo Shoot with Wrestlers
★ 4.5 · 277 reviews - Kyoto: Maiko Makeover and Photoshoot Experience
★ 4.7 · 239 reviews - Kyoto: Private Photoshoot Service
★ 5.0 · 158 reviews
Starting near Shinjuku Station at 7 p.m.
The meeting point is Happy Lemon Keio Shinjuku Shop at 1-chōme-1-4 Nishishinjuku. Start time is 7 p.m. Shinjuku Station is enormous, so give yourself extra time. The meeting instructions may be clear on paper but still difficult to follow once you are inside or around the station.
I would arrive early and keep the guide’s contact details handy. One person arrived near the station before the start time but spent another ten minutes locating the group. This is not a fault of the photography lesson, but it can spoil the opening minutes if you are unfamiliar with the area.
The tour is near public transportation, and most people can take part. You should expect a walking experience through busy streets rather than a seated class. Wear comfortable shoes, keep your camera easy to reach, and make sure your phone has enough battery for several hours of use.
Kabukicho: neon, crowds, and difficult light
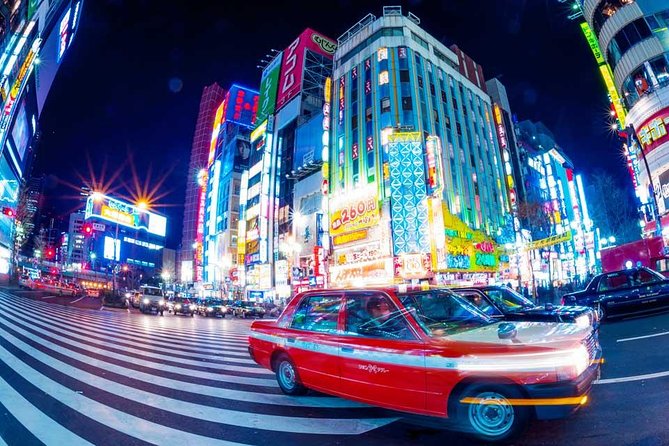
The first main stop is Kabukicho, the famous entertainment district of Shinjuku. You spend about an hour here, looking for illuminated signs, moving people, traffic, and strong lines created by the streets and buildings.
Kabukicho is a useful classroom because the light changes from one step to the next. A brightly lit sign can fool a phone or camera into underexposing the rest of the frame. A dark lane can do the opposite, leaving the sign washed out. Your guide can help you make small corrections and show you how to balance the brightest parts of the scene with the shadows.
This is also where you can practice candid street images. The point is not simply to photograph people without thought. You are learning how to notice movement, wait for a useful arrangement, and keep distracting objects out of the frame. A guide can also point out positions that give you a cleaner view of the street.
If you use a phone, you can still work on composition and timing. Guides have shown phone users how to use contrast controls, lock focus or exposure, and make the most of the camera already in their pocket. You will not get every control available on a dedicated camera, but you can still leave with useful habits.
Omoide Yokocho: a smaller, more intimate scene
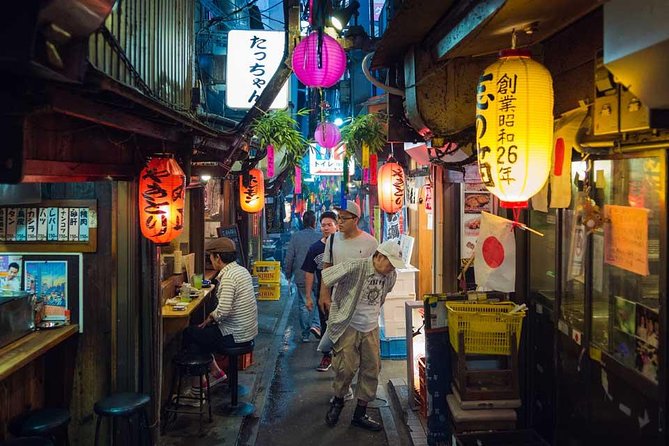
The route continues to Omoide Yokocho, also called Memory Lane, for about 30 minutes. This narrow area offers a different kind of night photography from Kabukicho. Instead of wide streets and tall signs, you get tighter views, small storefronts, glowing lanterns, and compressed layers of people and buildings.
It is a good place to think about framing. In a narrow lane, the edges of your image matter. A sign or doorway can act as a border, while the lines of the lane pull the eye toward the middle. Your guide may help you find a position that shows depth without filling the photograph with random clutter.
The short stop is enough to add variety, but it is not a long food tour or cultural lecture. If you want detailed background on the neighborhood, this may feel limited. The guide’s priority is finding and making photographs, not explaining every part of the area.
That said, this stop adds welcome texture to the evening. Tokyo’s famous night scenes are not all giant crossings and glowing billboards. Smaller streets often give you more control over the frame, and they let you work slowly before the tour reaches Shibuya’s crowds.
Same base, a different sort of day:
- Mt Fuji and Hakone 1-Day Bus Tour Return by Bullet Train
★ 5.0 · 26,383 reviews - 1-Day Tokyo Bus Tour
★ 5.0 · 14,250 reviews - Tokyo: TOKYO SKYTREE® Admission ticket
★ 4.5 · 11,192 reviews - Tokyo: teamLab Planets TOKYO Digital Art Museum Entry Ticket
★ 4.6 · 9,779 reviews
The train from Shinjuku to Shibuya
After Shinjuku, you travel to Shibuya by train. The fare is at your own expense, and the tour information also lists bus fare as not included. Plan for this small extra cost and follow the guide closely during the change of district.
The transfer is practical rather than scenic. Its value is that it connects two very different photo settings in one evening. You begin with Shinjuku’s signs and narrow streets, then finish among Shibuya’s youth culture, nightlife, shops, and famous crossing.
Keep your equipment packed while moving through the station. Shinjuku and Shibuya are both crowded, and stopping in the wrong spot can block other people. This is one reason a small group and an attentive guide help.
Shibuya Crossing: the main photographic payoff
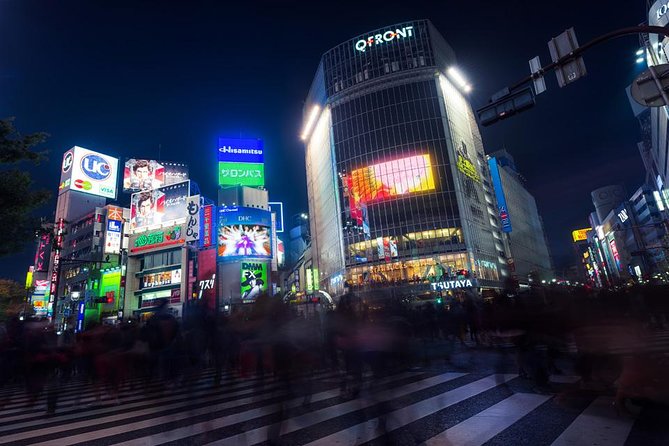
The final major stop is Shibuya Crossing, where you spend about 45 minutes. Thousands of people pass through the intersection, and illuminated signs surround the scene. It is the tour’s clearest chance to work on long exposure, motion, and scale.
A long exposure can turn moving crowds into soft streaks while keeping fixed signs and buildings sharp. Getting the effect right takes more than pressing the shutter. You need to consider how bright the signs are, how long the shutter stays open, and how steady the camera remains.
A tripod is not listed as included, and the tour does not promise one. One experienced participant suggested bringing a tripod and a camera with some control over shutter speed or total exposure. If you have a small tripod that is allowed in the places you use it, it may help, but you should not assume the guide provides equipment.
The crossing is also a good place to compare what your eyes see with what your camera records. The real scene can feel chaotic, while a carefully timed photograph can be orderly. Your guide can help you look for patterns, gaps, diagonals, and moments when several people line up in a pleasing way.
Do not expect unlimited time here. Forty-five minutes passes quickly once you are testing settings and waiting for a useful crossing. You finish near Shibuya Station at 2-chōme-2-1 Dōgenzaka, with the camera work ending there.
What the instructor can teach you
The exact guide varies, but the names connected with this experience include Charles, Lukasz, Luke, Stephane, and Nat. The most useful teaching style described by the experience is practical and hands-on. You try a setting, look at the result, and adjust.
You can ask for help with:
- Shutter speed and long exposure
- Composition in crowded streets
- Exposure in bright neon light
- Phone camera contrast and exposure controls
- Focus and exposure lock on a smartphone
- Basic camera adjustments for night scenes
- Finding a better position before taking the picture
Charles has been especially praised for patience, clear camera advice, and knowledge of the local areas. Lukasz and Luke have also been described as careful instructors who give time to both beginners and more experienced photographers. Stephane has helped with composition and camera capabilities.
The instruction is not identical for every person. If you arrive with a clear goal, you are more likely to get useful help. Tell the instructor if you want to work on phone photography, long exposure, candid people shots, or camera controls. Do not wait until the last few minutes to ask.
Is the small group worth the $184.99 price?
The listed price is $184.99 per group of up to two people. That makes the value easier to judge if you are traveling as a couple or with a friend. Split between two people, the cost is about $92.50 each before the separate train fare.
You are paying for more than a route through Shinjuku and Shibuya. You get a professional photography instructor, a planned sequence of locations, help with your own camera or phone, and a group limited to four participants. If you already know Tokyo well and only want someone to show you the sights, the price may feel high.
For a beginner, the personal instruction can make the cost reasonable. A few useful lessons about exposure or composition can improve the rest of your trip, not just the photographs taken during this evening. The same is true for phone users, since the guide can explain controls you may have ignored.
The value is weaker if you want a broad Tokyo history tour, a meal, or included transportation. This is a focused photo workshop with a city walk attached. The experience earns its price when you care about making better images.
Pace, weather, and other practical concerns
The walk lasts about three hours, although the detailed description also calls it a 2.5-hour photo adventure. Allow roughly three hours from the 7 p.m. start, including movement between areas. The listed stops total about two hours and fifteen minutes, with the remaining time used for walking, instruction, and the train transfer.
You need to keep the group in sight. One serious complaint involved a participant who could not keep up and eventually lost the guide, missing the last hour. The route crosses crowded areas, so tell the guide early if you need a slower pace.
The experience requires good weather. If poor weather cancels it, you are offered another date or a full refund. It is non-refundable for ordinary cancellation or changes, so do not book it casually if your schedule may shift.
Mobile tickets are supported, and confirmation normally arrives at booking. If you book within 16 hours of departure, confirmation comes as soon as possible and depends on availability.
Who should book this experience?
I would recommend it most strongly to:
- Beginners who want direct help instead of a self-guided lesson
- Phone photographers who want better night images
- Couples or friends who can share the group price
- Camera users interested in shutter speed and long exposure
- People visiting Tokyo for the first time who want a planned night route
- Photographers who enjoy street scenes more than formal landmarks
I would be more cautious if you walk slowly, dislike crowds, or want a relaxed neighborhood stroll. The pace, station transfer, and busy streets require attention. It is also not the right choice if your main goal is historical or cultural explanation.
Should you book the Tokyo Cyberpunk Street Photo Tour?
Book it if you want to come home with stronger night photographs and prefer learning by doing. The combination of Kabukicho, Omoide Yokocho, and Shibuya Crossing gives you three useful settings, while the four-person limit allows the guide to work with your actual equipment.
Bring a camera that allows some exposure control if you have one, or bring your phone and arrive ready to learn its less obvious tools. Meet early, budget for the train, watch the pace, and treat the evening as a photography class first.
Skip it if you only want sightseeing or if a non-refundable booking feels risky. For everyone else, especially a pair of photo-minded visitors, this is a focused and practical way to see Tokyo after dark.
FAQ
How long does the Tokyo Cyberpunk Street Photo Tour last?
The experience is advertised at about three hours. The detailed description also gives a duration of 2.5 hours, so you should allow roughly three hours from the 7 p.m. start.
Where does the tour begin?
It begins at Happy Lemon Keio Shinjuku Shop, 1-chōme-1-4 Nishishinjuku, Shinjuku City, Tokyo 160-0023, Japan.
Where does the tour finish?
The tour finishes at 2-chōme-2-1 Dōgenzaka, Shibuya, Tokyo 150-0043, Japan, near Shibuya Station.
What time does the tour start?
The start time is 7 p.m.
Does the tour include Shibuya Crossing?
Yes. Shibuya Crossing is the final main stop, with about 45 minutes set aside for photography.
Is transportation included?
No. You travel by train from Shinjuku to Shibuya, and the fare is paid separately. Bus fare is also listed as not included.
Can I use a smartphone instead of a camera?
Yes. You can use a camera or smartphone, and the photography instructor can provide advice on phone camera settings and composition.
How many people can join?
The maximum group size is four people. The listed price covers a group of up to two.
What happens if bad weather cancels the tour?
You will be offered a different date or a full refund if poor weather causes the experience to be canceled. The booking is otherwise non-refundable and cannot be changed for personal reasons.
Just added in Tokyo
- Small-Group Wagyu Beef and 7 Japanese Dishes Tokyo Cooking Class★ 5.0 · 190 reviews
- Nikko: Edo Wonderland Edomura Cultural Theme Park Ticket★ 4.3 · 205 reviews
- 《MEMBERS-ONLY-BAR-HOPPING》Discover Your Special Whiskey in Tokyo!★ 5.0 · 29 reviews
- Japanese Whisky Hunting《HIGH-QUALITY-ONLY》Rare Tasting Class★ 5.0 · 20 reviews
- Luxury Tokyo Sake, Cocktail, Whisky and Pairing Tour★ 5.0 · 18 reviews
- Wagyu & Sake Pairing in Shinjuku – Steak, Shabu-Shabu & More★ 5.0 · 112 reviews
- From Tokyo: Private Tour to Fuji/Hakone – Onsen, Art, Nature★ 5.0 · 116 reviews
- Tokyo: KABUKI Show at Kabukiza Theatre Admission Ticket★ 4.8 · 152 reviews
Photography Sessions, compared.
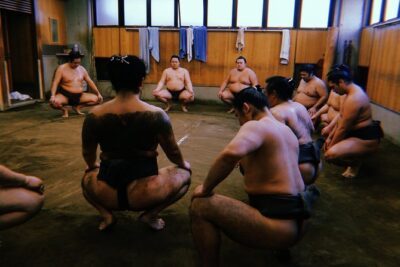
Tokyo Ryogoku Sumo Morning Practice + Photo Shoot with Wrestlers
Read our review →
Browse the lists this tour appears in